Yum

Blissful Eats with The Cook’s Atelier || Gariguette Strawberry Tart

June 11, 2015

GIOWn9AivaIxdYBHLZL9bxXX8GlDIOu1agMW4kOhTg4

Hello Blissful readers! We hope you are all well and enjoying the first tastes of summer.

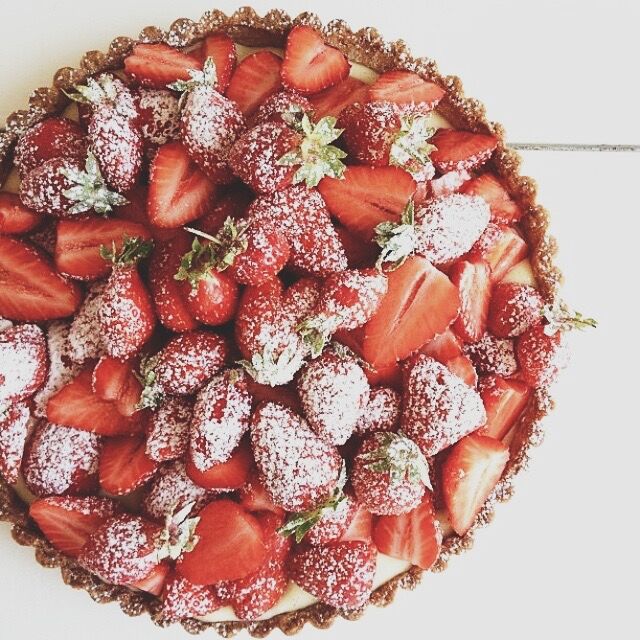
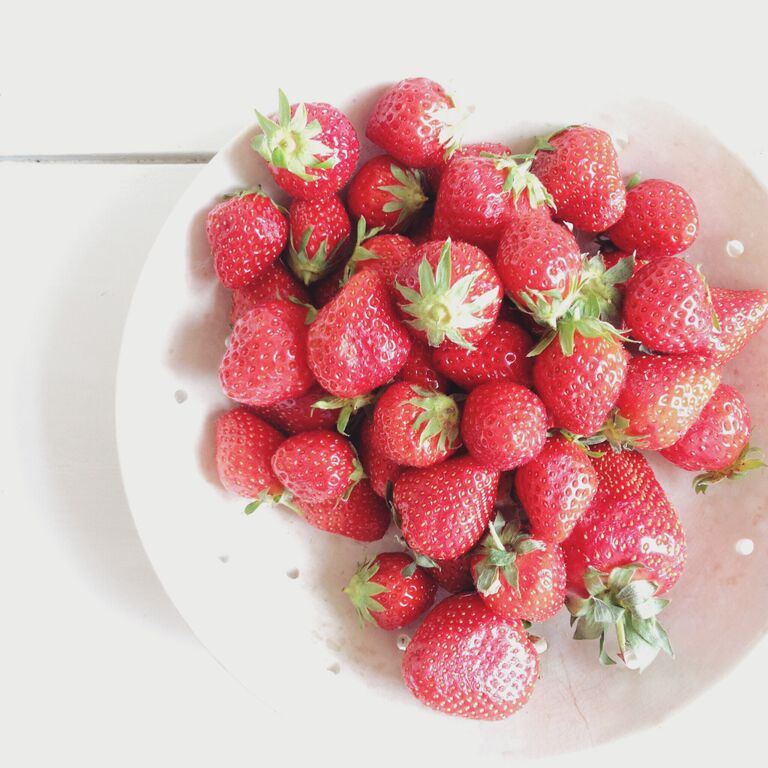
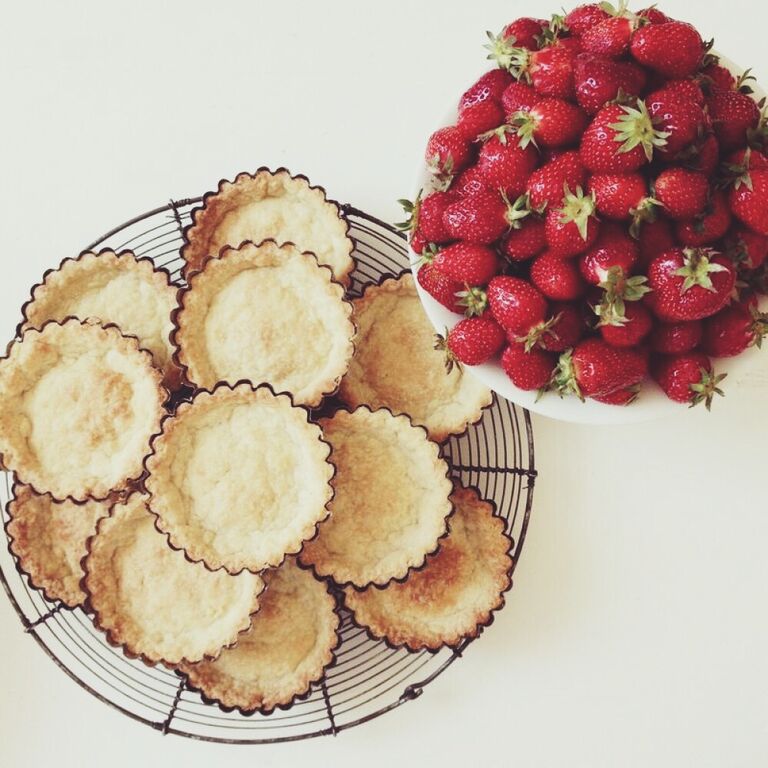
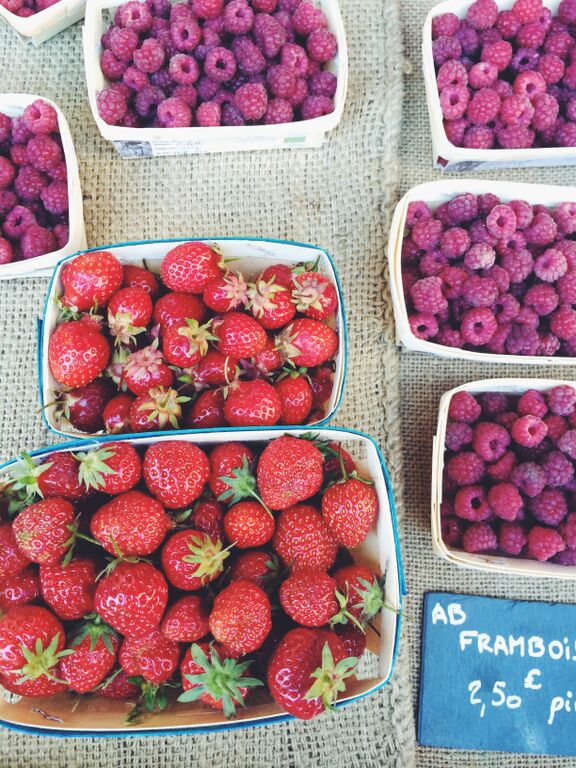
We are in full swing here at The Cook’s Atelier and the market is busting at the seams with the delights of the season. Here’s a recipe for an all-time favorite, a rustic strawberry tart. This is the perfect summer tart recipe and you can adapt it according to what looks good at the market. Sublime! We also love making these into individual tartlettes. By chance, if you have a little homemade strawberry confiture in your pantry, it would be a nice additional layer just under the pastry cream.

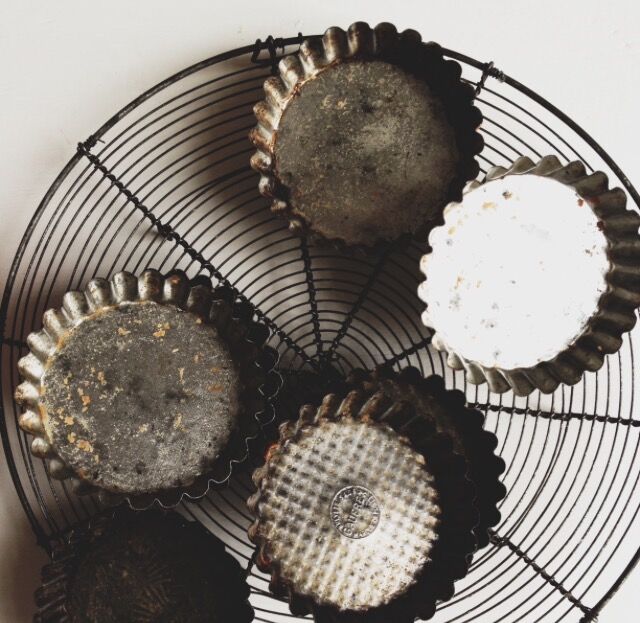
See our online shop, The French Larder at The Cook’s Atelier, for the perfect French tart tins.

8G9pEEJNKSLWkgVjhOjLv3E2sH-SSOMxYEGZ_H_u6OQ

Gariguette Strawberry Tart

Makes one 9-inch tart (or 8 individual tartelettes)


1/2 recipe Pâte Sucrée (recipe follows)

All-purpose flour, for work surface

1/2 cup heavy cream

1 teaspoon sugar

Pastry Cream (recipe follows)

2 cups strawberries

confectioners sugar for dusting

QlcVOSoPwlzbe9uv8d2_4TJ2j9ETQn71WcoL93XsJsg

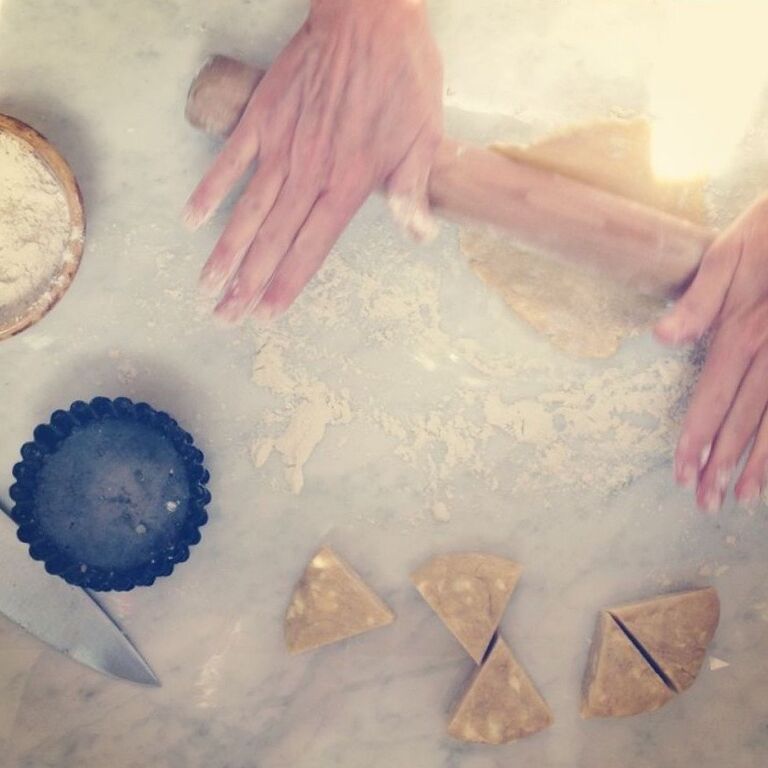
On a lightly floured work surface, roll out dough to a 12-inch round, about 1/4 inch thick. With a pastry brush, sweep off excess flour, fit dough into a 9-inch round fluted tart pan with a removable bottom (or you can uses 8 tartelette pans for individual servings), pressing into the edges and using thumb to remove excess dough. Chill tart shell until firm, about 30 minutes.

Preheat oven to 375 degrees F. Prick bottom of dough all over with a fork. Line with parchment paper, leaving a 1-inch overhang. Fill with dried beans and bake until the edges are just beginning to turn golden. Remove parchment paper and weights; continue baking until golden all over, 10 to 15 minutes. Cool tart shell completely on a wire rack.

Meanwhile, whip the heavy cream and sugar in a bowl until soft peaks form. Working in batches, gently fold whipped cream into pastry cream; set aside.

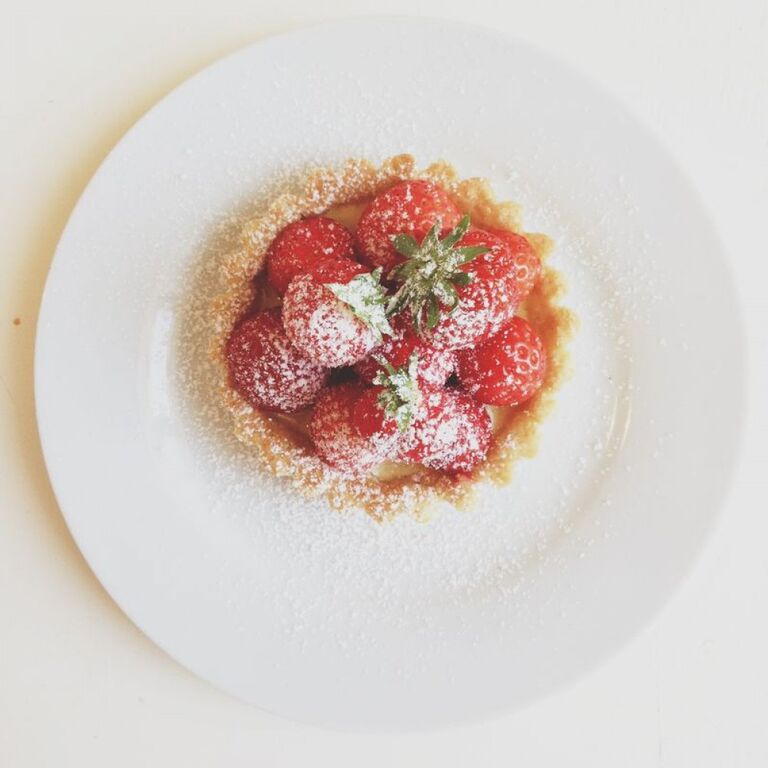
Spoon pastry cream mixture into cooled tart shell and spread evenly. Top with strawberries; dust with confectioners sugar. Tart is best served the day it is made.

oQnMhv6nDfaoy-U0OT8k2_xmtXuqDvKAqG4Mv38m83YPâte Sucrée

Makes enough for 2 tarts


1/4 cup heavy cream

2 large egg yolks

2 3/4 cups all-purpose flour

1/4 cups granulated sugar

1/4 teaspoon salt

1/2 pound unsalted butter


Whisk the cream and egg yolks together in a small bowl.

Combine the flour, sugar and salt in a large bowl. Cut the butter into small pieces, about a half an inch. Add the butter to the flour mixture and, using your hands, begin to toss to coat the butter with the flour. Using your hands, combine the butter with the flour mixture until it resembles coarse crumbs. Be careful not to overwork the dough as it will make the dough tough. Continue this process until it resembles a coarse meal. Add the heavy cream and egg yolk mixture and toss gently with a fork to incorporate. Feel free to use your hands to continue to combine the ingredients. But again, be sure to not overwork the dough. You can tell when the dough is ready by taking a small handful, squeezing it together. It if holds together, the dough is complete. If not, feel free to add more cream to reach the right consistency. When the dough is ready, divide the dough in two and place it on a sheet of plastic wrap. Gather the plastic wrap around the dough, forming a pouch, twist and push down to form a flat disk. Chill the dough for at least an hour or, ideally, overnight.

To make the tart shell, place the dough on a lightly floured work surface and roll until a 1/4 inch thick, flouring as necessary to prevent the dough from sticking to the surface. Be sure to maintain a circular shape while rolling out the dough. Beginning at one end, gather the dough at one end onto a rolling pin and gently lift it onto the tart pan. Unroll the dough over a 10-inch tart pan. Gently fit the dough loosely into the tart pan, being mindful not to stretch the dough as you fit it into the pan. To remove the excess dough, you use your thumb to gently scrape along the sides of the tart pan creating a nice, clean edge to the dough. Chill for 1 hour.

zpjCQAiN3uICaQ_7zrzK6S4Lyi8_d8ftymXMZsPp2wM

_od0xqdjm5ahuER25zqHvVhSwqMoPatUoMrzcAjykYsPastry Cream

Makes about 1 3/4 cups


1 cup whole milk

1/2 vanilla bean, split

5 tablespoons sugar

3 large egg yolks

1 tablespoon cornstarch

1 tablespoon flour

1 tablespoon unsalted butter


Place milk, vanilla bean and 4 tablespoons sugar in a medium saucepan over high heat; cook until almost boiling.

In a medium bowl, whisk together egg yolks with remaining 1 tablespoon of sugar until thickened. Sprinkle in the cornstarch and flour and continue beating until well combined.

Remove vanilla bean from milk. While whisking constantly, slowly pour heated-milk mixture into egg yolk mixture. Pour mixture through a fine sieve back into saucepan, and cook, whisking constantly, over medium-high heat, until it thickens, about 2 minutes.

Transfer to a large bowl and whisk in butter until melted. Cover with plastic wrap, pressing directly on the surface of the pastry cream; refrigerate until completely cooled.

Zp1dP7VhSPILGJuxX6gC6yI0kSUek8WIEYnbDg0GQI4Happy tart making!

Blissful Eats With The Cook’s Atelier || Fava Bean Fennel Salad

May 21, 2015

ZiGTBw5044vdgybKxzmOTZ1ra02EDDsQj3E_BMaNmY4

Hello Blissful readers! We hope you all are enjoying the sunshine. We wanted to share with you one of our favorite spring market salads. It’s oh so simple too and perfect for an alfresco dinner on the terrace with a chilled glass of rosé!

We know for sure that spring has arrived when we see the first fava beans at the market. They are a favorite here at The Cook’s Atelier and we love them for their bright green color and marshy flavor. They make their way in salads or mashed on crusty bread with a drizzle of fruity olive oil and sprinkling of our favorite fleur de sel. Heaven.

note: You can also substitute fava beans with French peas. We also like to vary this salad by adding thin shavings of garden radishes as well as mizuna or roquette. Any fresh herbs made be added, such as basil and chervil.

gGq2FPtQigSxc3yDzuQXVc5JnUr6MwGJSHSLuj3rnwk

Fava Bean Fennel Salad


8 to 10 pounds fresh young fava beans in the pod (10 pounds will yield about 6 cups of beans)

3 fennel bulbs, thinly sliced

1 bunch scallions or chives, thinly sliced

Sea salt and freshly ground black pepper

Fruity extra-virgin olive oil

1 handful of mint leaves

1 handful of parsley leaves

2 lemons, one sliced the other cut in half

Mizuna leaves

Grading of parmesan (optional)

B5PI1rB1Lf_aEKJiEvfAz7KK2yr2g7NWXws0FzGKwgU

erDYIn5bLlhlg1RZVr9foIhGbw40Q-Tu5WaNkXdlVRQ

Shuck the fava beans from their pods. Blanche the beans in salted boiling water for about 2 minutes. Plunge them into a bowl of ice water to cool them and preserve their color.

Once cool enough to handle, pop the beans out of their grey-green skin to release the bright green bean.

Trim and wash the fennel.

When you are ready to make the salad, slice the fennel into very thin slices (a mandoline works well for this task) and put them in a bowl. Add the fava beans, scallions and a good sprinkling of sea salt and a few grinds of black pepper. Drizzle generously with fruity olive oil to coat. Add the mint, parsley, lemon slices and mizuna leaves, then squeeze the juice of half a lemon over the salad. Toss well with your hands, then taste and correct the seasoning. Top with parmesan shavings if desired. Serve immediately.
We hope you enjoy! Bon Appétit!

IoXO7nnvqBPQmDdWrkTc4jAIvdXoH9_SquVfDOYQJnM

The Cook’s Atelier || Roasted Quail with a White Wine Jus

April 30, 2015

xib_TdkDRJrysOo9f_x7Ut85X_quAlQnHYwsr8PujsQ

Hello, Blissful readers! We hope you all are enjoying spring.

We want to share with you this week one of our recipes for Pan Roasted Quail. Quail is the ultimate, versatile little bird. It cooks quickly and looks very pretty on the plate. Here at The Cook’s Atelier, we cook quail all year long. In the autumn and winter months, it is great with pan-seared mushrooms and breadcrumbs. In the summertime, we pair it with a vibrant salsa verde. As a nod to spring, this version is light and elegant with springtime baby market vegetables. We roasted the potatoes, little tomatoes and the baby leeks separately. For the asparagus and fava beans, our preferred method is to barely blanch them and finish them with a little brown butter. The finishing touch is the pan sauce made with white wine. We hope you enjoy.

Roasted Quail with a White Wine Jus

Serves 6

6 whole quail

Sea salt

Freshly ground black pepper

A sprig or two of fresh rosemary, sage, thyme or marjoram

6 cloves of garlic, smashed

2 tablespoons unsalted butter, softened

Extra-virgin olive oil

JCAA3QttvfJQyF-zdTlMn3VdtD9ou-mB2mkvY1P0fEU

For the jus

1 shallot, chopped

1 sprig of thyme

1 bay leaf

1 cup dry white wine

A knob of unsalted butter

BrzXWTDLY2lTBCaw7i88Dy4kucf6cR24LHBT5pnikRA

Preheat the oven to 350 degrees F.

Cut off the feet at the knee joint and the head at the base of the neck. Rinse and thoroughly dry the bird. Season the inside of the quail with salt and pepper and stuff the cavity with herbs and a clove or two of garlic. Use your fingers to rub the softened butter all over the quail and season with salt and pepper.

In a large ovenproof skillet, drizzle some extra-virgin olive oil, just enough to coat the pan. Preheat the pan over medium high heat. Place the quail in the pan and sear on all sides for a nice, crispy skin. Slide the skillet in the oven and roast the quail until done, approximately 20 to 25 minutes.

To make the jus:

Remove the quail from the pan and set it on a warm cutting board to rest. Add the shallot, thyme and bay leaf to the pan and cook until the shallot is translucent, but not brown. Add the wine and deglaze the pan, scraping up all the little bits of browned quail. Strain the jus and continue to reduce until slightly thickened. Off the heat, add a knob of butter and swirl the pan to incorporate the butter in the jus.

XTvYFtPwYmJd9XEa0pnPlMB-xhy_7NtESuBuW0RS_PU-1

Mother’s Day is just around the corner. As many of you may already know, Mother’s Day is a big deal around here. In celebration of that very special day, we are announcing another Contest/Giveaway at The Cook’s Atelier on our Instagram feed. To enter the contest, be sure to go to Instagram, follow us @thecooksatelier, locate the mortar and pestle contest photo, then tag a friend in the comments section to share the contest and help spread the love! Our Mother’s Day Contest/Giveaway ends Monday, May 4, 2015 and we’ll be announcing the winner on Instagram. The winner will receive this beautiful marble mortar and pestle crafted in Italy. Bonne chance!

Looking forward to seeing you all next time!

Design by Ana Degenaar + Development by Brandi Bernoskie